Pink insulation is one of the most trusted and recognizable solutions on the market for improving home energy efficiency, comfort, and soundproofing. Whether you’re a homeowner looking to lower your energy bills or a contractor working on a renovation, knowing how to properly install pink insulation in walls, attics, and basements is a critical step.
This guide will walk you through the basics of pink insulation and provide practical tips for efficient installation in these key areas.
Pink insulation, typically made from fiberglass, is popular for its benefits:
1. Excellent thermal resistance (R-value)
2. Fire retardant properties
3. Resists mold and moisture
4. Great value for money
5. Long life and easy maintenance
Manufacturers like IKING have made pink the signature color of insulation—and for good reason. It’s easy to install, versatile, and suitable for multiple areas of the home.
Please prepare the following tools and materials before installation:
1. Pink fiberglass insulation (roll or sheet)
2. Multipurpose knife or insulation cutter
3. Tape measure
4. Stapling gun and nails
5. Protective gloves, goggles, dust mask
6. (If required by local building codes) moisture barrier/vapor barrier
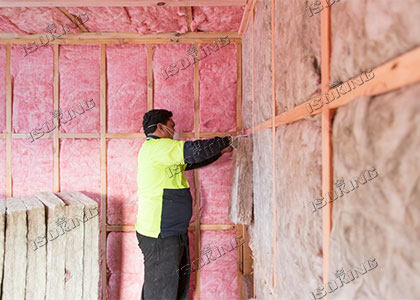
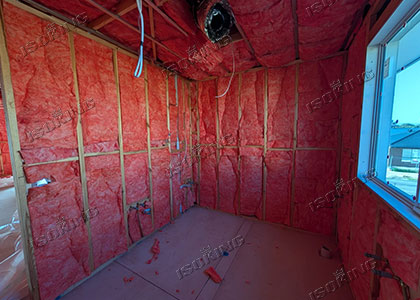
Wall cavities are one of the most common and important areas for insulation. The installation steps are as follows:
Installation steps:
Measure the wall cavity and estimate the amount of insulation required.
Cut the insulation to just fill each cavity, but do not compact it.
Place the insulation between the wall keels, ensuring complete coverage from top to bottom.
Use a staple gun to secure the edged insulation to the side of the keel.
Use foam or sealant to seal the gaps to enhance the insulation effect.
Tip: Avoid leaving gaps or compacting the material, which will significantly reduce its R-value.
The attic is usually the place where the most heat is lost in the home.
Installation steps:
Clean the attic floor to make sure there is no debris or water seepage.
Lay the insulation material flat between the wooden beams, starting from the farthest corner.
If you need to further improve efficiency, you can lay another layer of insulation material horizontally.
Retain ventilation space to ensure that the eaves are well ventilated to prevent condensation and mildew.
Tip: You can use a special attic measuring tape to ensure that the thickness of the insulation layer is consistent.
Basements are prone to cold, damp and drafty, and proper insulation can make them comfortable and practical spaces.
Installation steps:
If the basement is damp, use moisture-proof insulation materials.
Wall insulation can be done in two ways:
Fill the wooden frame wall with pink insulation cotton, or lay rigid foam board first, then add fiberglass insulation cotton.
Seal the corners and pipe gaps.
In cold climates, install a moisture barrier on the warm side to prevent moisture from seeping in.
Tip: If the basement is not heated, it is recommended to install insulation material between the floor beams.
Properly installing pink insulation in walls, attics and basements can not only significantly improve your home's energy efficiency and comfort, but also effectively control your monthly energy bills.
If you need high-quality pink glass wool or want to know more about the product, please contact us at IKING GROUP.
CHINA IKING INDUSTRIAL GROUP CO., LTD. glass wool factory was established in 1995 and is located in Tianjin. It is one of the leading glass wool supplier in China.....[ Read More >>]
![]()
![]()
![]()
![]()
![]()
![]()

